Posts

Chocolate Raspberry Linzer Cookies

Image
It has been a while since I shared a recipe and this is a good one!  I usually make these to include on my Christmas cookie tray that we give friends.  This year I never got around to making cookie trays and planned to do something for Valentine's day.  That didn't happen either.  However, my son helped to make some because he wanted to give a tin to his girlfriend that night. Chocolate Raspberry Linzer Cookies 2-1/3C flour 1t baking powder 1/2t salt 1/2t cinnamon 1C sugar 3/4C butter, softened 2 eggs 1/2t almond extract 1 pkg. (12 oz.) chocolate morsels 6T raspberry jam or preserves Confectioners' sugar In a small bowl, combine flour, baking powder, salt and cinnamon; set aside.  In a large bowl, beat sugar and butter until creamy.  Beat in eggs and almond extract.  Gradually beat in flour mixture.  Divide dough in half.  Wrap in plastic wrap; refrigerate until firm. Preheat oven to 350.  On a lightly floured board, ...

Chocolate Dipped Strawberry

Image
Recently, there was a blog hop.  Life has been pretty crazy lately so I frequently skip blog hops right now but I looked this time.  I was looking for a small thank you for teachers and leaders at church.  I ended up making 32 match boxes for them.  However, finishing in the wee hours of the morning and needing to get a little over an hour of sleep before I had to be up for church, I skipped the picture of that project.  I digress . . . I came across this sweet little package on Lisa Young's blog  and knew I had to make it.  I made a few to hand out at a meeting I had on Valentine's Day and my son liked it so much that he wanted one to give his girlfriend. A couple of tips: Cut 3 pieces of real red and chocolate chip using the petal cone die.  On one piece, cut off the panel without the tab.  When they are connected, you should have 5 panels instead of 6. When you are embossing the real red cardstock for the strawberry, be sure you ...

Mixed Bunch

Image
When my husband travels, I tend to manage my time better and I keep up with everything a little better because I know it's just me to get it done and if I procrastinate . . . well, it wouldn't be a pretty picture.  It is amazing how much 4 kids can still leave around as teens/tweens.  While I have been managing time pretty well, stamping had to be put aside during the holidays and for an early "spring cleaning".  I'm hoping to get back into it a little at a time, but I know other things are going to occupy my time.  Happy news is we reached 6 mos. (1/2 way) for my husband's deployment last week.  Next month he will be home for his R&R and then he heads back to finish out his year. Cristena shared this card on Late Night Stampers and I liked how happy looking it was.  The only difference between her card and this is that hers used the Blossom Builders for the Center and I think she tied the button.  Like Cristena, I used two layers of the WW with...

Pines and Poinsettias

Image
I like using the designer frames embossing folder and the oval punch.  I've been punching images to put in the frame other times but today I opted to make a frame.  Fun card to make, although cutting the main image took some time. Stamps:  Pines & Poinsettias, Occasional Quotes CS:  Real Red, Wild Wasabi, WW, Holly Berry Bouquet Ink:  Real Red, Wild Wasabi Misc.:  Dimensionals, designer frames embossing folder, lg. oval punch

More details on the Poinsettia Box

Image
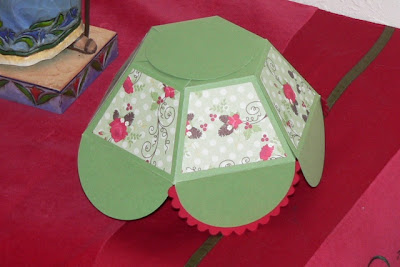
I really appreciated all of the comments I got from the blog hop and through e-mail.  I wish I had the time to for a tutorial but time is something I lack.  Someone could get rich if they could bottle time and sell it because so many are looking for more of it.   I've had quite a few e-mails with questions on various aspects of the box and I've been responding to them as they come in.  I thought I would post some of the answers here in case anyone else is trying to make it.   Question:  How did you cut the DP for the box? Answer:  I'm sure there is an easier way than what I did but this is what I did.  I cut a petal cone on scrap paper and cut at the score line and then proceeded to cut the other edges so I was left with one panel.  I then cut off from each side 1/8".  I used that as a template. Question:  When I stamp the leaf you said you used on the poinsettia, it doesn't cover the petal.  What did you do...

SUStars Gift-Giving Ideas Blog Hop

Image
I hope you are seeing a lot of great ideas to help spark your creativity on gift-giving.  You probably just came here from Shelly's blog.   Welcome! I'm happy to share this cute box with you today.  I saw a Halloween themed one that I thought was darling.  I wanted to make something similar and this provided the perfect opportunity. I didn't secure the poinsettia on top because I don't have anything in the box but you get the idea.  I used the Petal Cone die and cut three of the cones for this box.  Every other flap has the red scallop border. To make the poinsettia, I used the Island Floral die, the Stocking Accents die, and the 5 Petal Flower punch.  The light bulb from the Stocking Accents die is a perfect shape and is a little smaller, complimenting the 3-petal cluster from the Island Floral die.  The second layer from the top has a mix of the single petal from the Island Floral die and the light bulb, because it is true of poinsett...

Another Owl

Image
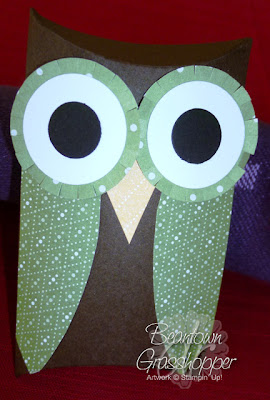
Not a whole lot to say on this. CS:  Paper Pack (retired?), Early Espresso Punches:  1-1/4", 1", 1/2" Dies:  Pillow Box, Oval Scallop Frame (for the wings)