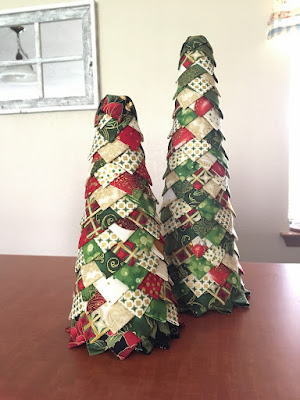
Christmas Tree
This seems to be the year for me to re-create crafts that I did with my mom or that she made. In the early 80's, a friend of my mother's had us over and we sat at her kitchen table each making a tree like this. I always liked that tree and decided this would be the year I would make it again.
All you need to make it is 30 feet of plush garland. 6 wire hangers. Zip ties or twist ties. A strand of lights. I think we used a strand of 100 mini lights so many years ago. I've been debating this in my mind though. 50 seemed like it would be enough and 100 perhaps too much. I was at the hardware store today and saw a box of 70 lights and figured it was middle of the road . . . perfect. The bulbs were a little bigger than the typical strand of lights, this could work too. Having made the tree I have mixed thoughts on the lights. I would opt for the 100 bulb strand to have more lights, but then, I like lights. I like the bulbs of what I used today because they stand out more when the tree isn't lit. You decide which is better if you choose to make it.
It is so worth it to buy quality garland instead of the flat cheap stuff. You can use the flat garland, but you will need more of it. I used 2 - 15 foot strands for this tree.
First off, you need to make 3 sets of the hangers. You can see I used zip ties at the top and on the sides. It doesn't matter if the hook part of the hanger is up or down, it's all the same in the end.
I didn't take pictures of the part where I put them together, just the end result. Simply put the leg of one set through the middle of the other, matching the top point at the center. Repeat the step with the third set of hangers. Secure them together with zip ties. Do your best to have the base of the tree evenly spaced between hangers. Trim the zip ties.
Put the flat plug down the center of the hanger and start attaching the lights with the zip ties.
It is important to keep the wire tight toward the bottom. At the top, you are able to tuck the wire in toward the center because the hangers are so close together. I had to re-attach a couple of rows on the bottom because it was too loose. If it is too loose, you use more garland to cover up the wires and it will look off with bulk and lights being hidden. BE SURE THE PLUG IS AT THE BOTTOM SO YOU CAN PLUG IT IN WHEN YOU ARE DONE.
Start the garland the same way you did the lights with the end down the center.
Wrap it tightly around the wire frame. No need to secure with glue, etc. It will be fine.
When you finish the strand, you can wrap it around a wire from the frame or the center, leaving a little loop so you can feed the end through the center and pull it tight. This will keep it from unraveling.
My tree with the 30 feet of garland and 70 lights.
Lit up. I still need to make a star for the top but I'm happy to have it made.
It took less than 2 hours to make this. I walked the dog during that time and had to rewrap the bottom part of my lights. Overall, a quick easy craft that is nice for Christmas in your home, office, a gift, for a child away from home to snazz up their space.


.jpg)
.jpg)
.jpg)
.jpg)
.jpg)
.jpg)
.jpg)
.jpg)
.jpg)
.jpg)
.jpg)


Very nice!!!!
ReplyDeleteIt looks like you doubled the amount of hangers you used. It really turned out nice though, I am going to try it!
ReplyDeleteshe used 6
DeleteWhat a great idea, looks amazing
ReplyDeleteI made several of these, green, silver and then taught a class at the Senior Center. Thank you so much. Wish I could post a picture they all turned out great.
ReplyDeleteThank you very much. I made over 50 years ago, then had one again for me & my mom from 2012-2016. I tried last year but couldn’t get the hangers together. Now I will make one this year with your help.
ReplyDelete