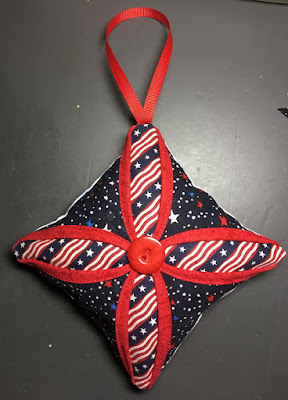
Cathedral Window Ornament
I tried to remember to take pictures as I went through the process. I made 64 of these ornaments in an assembly line sort of way in that I did each step for all of them and then moved on to the next step.
The Main Fabric is 10" x10"
Center fabric (lower right) is 5" x 5"
Accent fabric measures 4.5" x 4.5"
Backing is 5" x 5" (not pictured)
Ribbon is 8"
Start by folding the fabric in half and pressing and then folding it in half the other direction and pressing. This gives the "plus" sign you see in the picture above.
This give you your guide to bring in all four corners and press.
You should have an "x" like you see above. Now you do it again.
You can see in the above picture that the points all meet in the center. You want to be as precise as possible. You can see I was a little off on the right hand side. Was it my pressing? Did I not measure the fabric precisely? I'm not sure but it still worked out OK in the end.
Open up the flaps and insert the center fabric. You can see in the picture below that the fabric pushes out the corners a bit.
Pin it so it stays in place while you tack the center. You want to sew about 1/2 of an inch (1/4" on each flap. Be sure to secure both ends when you sew. I reinforced it at the beginning and end rather than back stitching. You want this secure.
I did a close-up so you could see the stitching above. The picture below shows the whole square with the center tacked.
Cross cut your accent fabric and tack it with a little (sparingly little) glue to the square base. Note that have it lined up to the edge and the center has the border of the base fabric.
Use your zipper foot and pull back the fabric to sew. It will take shape on its own. Do your best to sew close to the edge. The tutorial I used is here and would be helpful to watch and see how easy it is.
I put right sides together to sew with the ribbon looped and pinned inward on a corner. Sewed it up leaving several inches on one side to turn it right side out, stuffed it, and sewed it closed.
A good tip from the video is to press the opening with a quarter inch before you stuff it to make it easier to whip stitch closed. Sew on your button.


.jpg)
Comments
Post a Comment