
Light Ball
Back in 1997 or 1998 we were living in Sacramento in a town house. One evening we went for a walk to look at Christmas lights and decorations. As we were walking, I saw this light ball hanging by someone's front door. I thought it was awesome. A year or two later, I found directions to make it but I never did. Every year I would have the best of intentions to make it. On several occasions I bought the cups to make it. Lights are never an issue. I have a plastic tote filled with lights.
This year I have 5+ projects to make: 1. pine cone light basket, 2. light ball, 3. wreath for the kitchen, 4. wooden candle trio that is 42" tall, and 5. "NOEL" for the mantle. The other projects are small things that I want to make to give to people. I made the pine cone light basket on the 8th. I made one back in 2000 which got wrecked in one of the moves or perhaps water damaged from flooding in the basement in Virginia that happened several times or the water heater in Florida that sprayed gallons of water all over.
Materials for the light ball:
50 clear plastic cups
100 miniature lights
stapler
drill w/ 1/2" bit and a smaller one for hanging
clothes pins
wire to hang
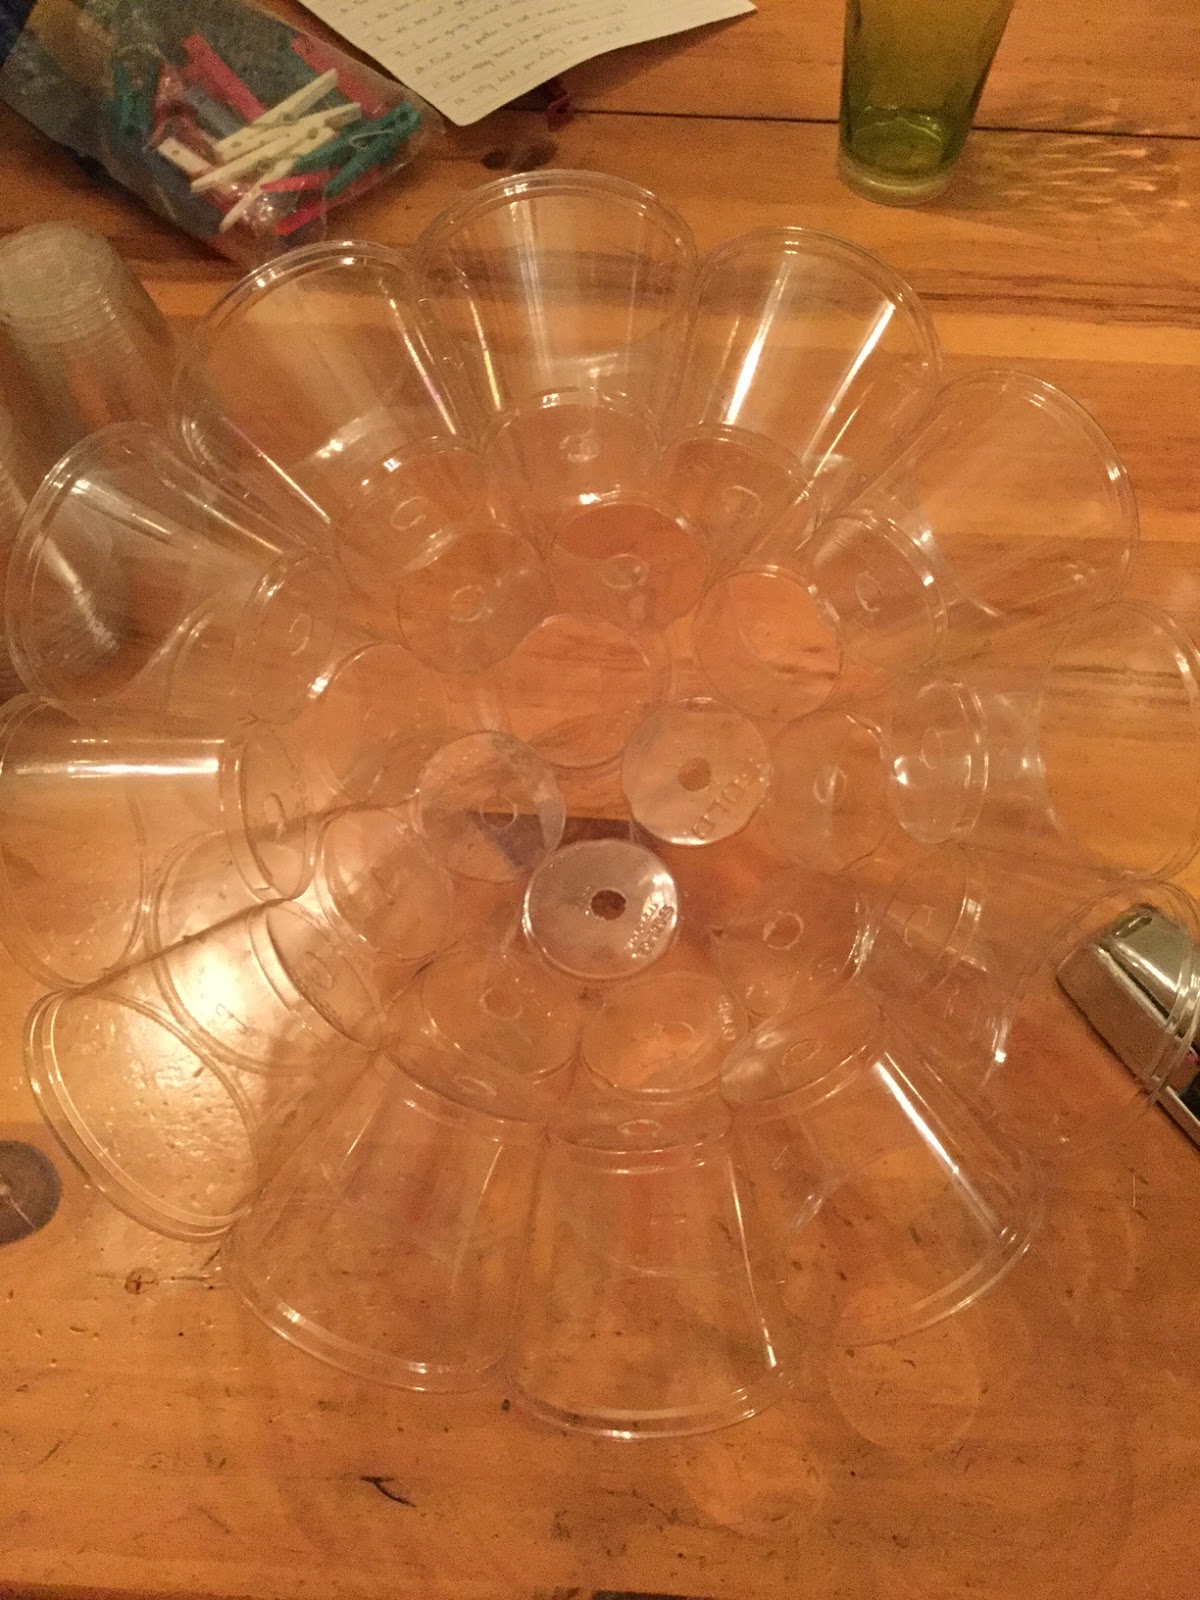
I started by drilling a 1/2" circle in the bottom center of 50+ cups. I say 50+ because half a dozen or so may not drill great. The cup may crinkle, the circle piece doesn't break off nicely. Fortunately, I had purchased 60 cups and I used 56 of them. It is could to have a spare or two for the ball in case a cup splits when stapling them together. The bottom left cup shows the 1/2" hole.
 Two cups need to be drilled in the side toward the top to run a wire through to hang it. I made the hole on an "invisible" line the cup has so I knew they would be close enough to match up. I think I would have moved it up 1/4" so that they were closer (as in touching). Mine have a little gap where the wire runs through for hanging. This could be done at the end. If you do drill the holes right off, put these two cups aside for the top.
 To make the sphere, you will make it in two halves. The cups for each half are 12, 9 and 4.
Start by making a circle of 12 cups. The cups naturally form the shape of the circle. I went ahead and made the circle, holding them together with the clothes pins so you would have the visual. These cups have a rim so I alternated with the rim of every other cup being on top.
Staple the sides of each cup together. I used a basic desk stapler. A plier stapler is ideal too. I have 2-3 staples in each side. I want mine durable to withstand winter winds outside.
 Now you start with your row of 9 cups on the 12. These you just have to add on top and next to each other. I recommend only one staple to attach them in case you need to undo a staple and shift a little. Once you are happy with how they are, go back and add more staples.
 A picture of the second row half done adding cups.
 The second row is complete and ready for 4 cups to be attached in the center. I used 4 cups with just the bottom drilled. This first half was the bottom of my sphere and I want the cord to come out my top.
 This is what it looks like inverted when the half is together.
 From the top.
 Time to add the lights. If you want to be able to run cords, then leave the plug outside the cups. I don't plan to do that so I left mine tucked in the center. I added two lights to each drilled hole.
 Half of the sphere is made with 50 of the 100 lights inserted in the holes.
 Now you get to make the second half as you did the first. When put the lights in the holes, I didn't continue where I left off with the strand. I did the same as before starting at the end. Be sure to leave the plug out through the gap in the center cups. Match up your side circles on the 2 cups at the top so you can hang it too.
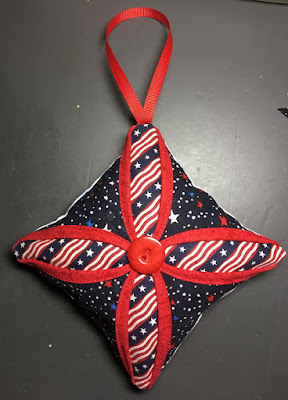
This is what it looks like put together. I used the clothes pins to hold it while I stapled both halves together. It made it a lot easier to see where I was attaching. You will be turning the ball some as you staple and it is surprisingly easy to lose track of where you are stapling.
 This is what it looks like lit up. Colored lights look beautiful but I chose white because I'm using it out back and want to have it up longer than the Christmas season.


This year I have 5+ projects to make: 1. pine cone light basket, 2. light ball, 3. wreath for the kitchen, 4. wooden candle trio that is 42" tall, and 5. "NOEL" for the mantle. The other projects are small things that I want to make to give to people. I made the pine cone light basket on the 8th. I made one back in 2000 which got wrecked in one of the moves or perhaps water damaged from flooding in the basement in Virginia that happened several times or the water heater in Florida that sprayed gallons of water all over.
Materials for the light ball:
50 clear plastic cups
100 miniature lights
stapler
drill w/ 1/2" bit and a smaller one for hanging
clothes pins
wire to hang
I started by drilling a 1/2" circle in the bottom center of 50+ cups. I say 50+ because half a dozen or so may not drill great. The cup may crinkle, the circle piece doesn't break off nicely. Fortunately, I had purchased 60 cups and I used 56 of them. It is could to have a spare or two for the ball in case a cup splits when stapling them together. The bottom left cup shows the 1/2" hole.


Start by making a circle of 12 cups. The cups naturally form the shape of the circle. I went ahead and made the circle, holding them together with the clothes pins so you would have the visual. These cups have a rim so I alternated with the rim of every other cup being on top.
Staple the sides of each cup together. I used a basic desk stapler. A plier stapler is ideal too. I have 2-3 staples in each side. I want mine durable to withstand winter winds outside.


This is what it looks like put together. I used the clothes pins to hold it while I stapled both halves together. It made it a lot easier to see where I was attaching. You will be turning the ball some as you staple and it is surprisingly easy to lose track of where you are stapling.


.jpg)
Comments
Post a Comment